GitHub 免费个人账户的私有仓库有一定权限限制,比如无法使用公开的 GitHub Pages 对外展示。这个限制可能会给博客作者带来不便,因为他们一方面希望保护原始内容的私有性,又希望渲染的文章界面能公开访问。
这个问题有官方默许的解决方案,参考actions-gh-pages 组件对选项 external_repository 的说明:
⭐️ Deploy to external repository
external_repository...
You can use
deploy_keyorpersonal_token. When you usedeploy_key, set your private key to the repository which includes this action and set your public key to your external repository....
Use case:
A GitHub Free Plan account cannot use the GitHub Pages in a private repository. To make your source contents private and deploy it with the GitHub Pages, you can deploy your site from a private repository to a public repository using this option.
peaceiris/homepage: A private repository running this action withexternal_repository: peaceiris/peaceiris.github.iopeaceiris/peaceiris.github.io: A public repository using GitHub Pages
该选项支持从一个仓库(可以私有)渲染出来的网页资源,推送到另一个仓库中。作者也在这里特地标注了使用场景:在保证原始内容私有的情况下部署 GitHub Pages 网站到另一个公共仓库。
GitHub Actions
新建并编辑私有仓库的 .github/workflows/deploy.yml 文件
name: Deploy pages to external repo

on:
  # Triggers the workflow on push or pull request events but only for the main branch
  push:
    branches:
      - main
  pull_request:
    branches:
      - main

jobs:
  build-artifacts:
    runs-on: ubuntu-latest

    steps:
      # Step 1: Checkout code
      - name: Checkout code
        uses: actions/checkout@v3
        with:
          submodules: recursive

      # Step 2: Sync Git Submodule
      - name: Git Submodule Sync
        run: |
          git submodule sync
          git submodule update --init --recursive

      # Step 3: Install Zola (the static site generator I used)
      - name: Install Zola
        uses: taiki-e/install-action@v2
        with:
          tool: [email protected]

      # Step 4: Build Zola static sites
      - name: Build Zola static site(s)
        run: zola build

      # Step 5: Save build artifacts
      - name: Save build artifacts
        uses: actions/upload-artifact@v4
        with:
          name: zola-site
          path: public/
          if-no-files-found: error

  deploy-public:
    # Depends on 'build-artifacts' job
    needs: build-artifacts
    runs-on: ubuntu-latest

    steps:
      # Step 6: Download the artifacts (zola-site)
      - name: Download build artifacts
        uses: actions/download-artifact@v4
        with:
          name: zola-site
          path: public/
      # Step 7: Deploy to another repository
      - name: Deploy to GitHub Pages
        uses: peaceiris/actions-gh-pages@v4
        with:
          deploy_key: ${{ secrets.PAGES_DEPLOY_KEY }}
          publish_dir: ./public
          allow_empty_commit: false
          external_repository: <user_name>/<user_name>.github.io
          publish_branch: main
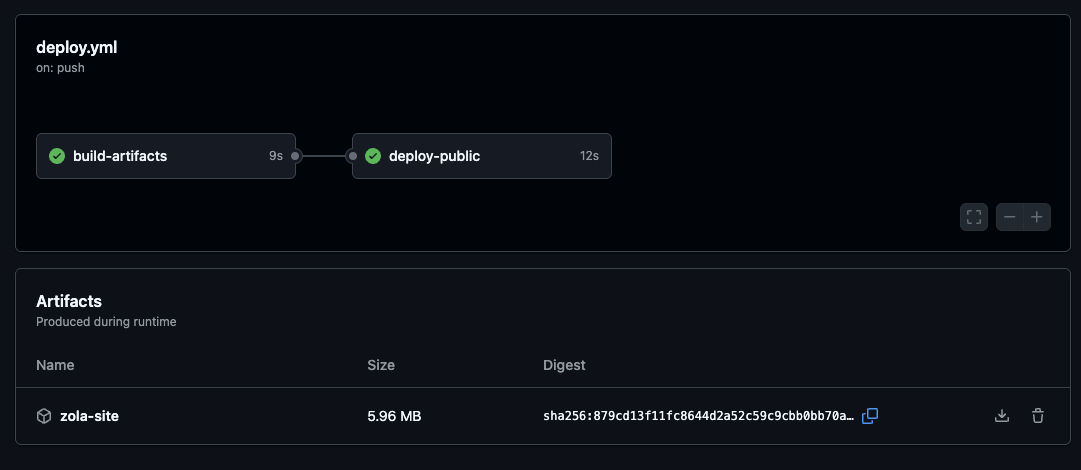
我构建的工作流分为两步:
- 生成站点资源后 upload artifact 并保存
- 下载资源后使用
peaceiris/actions-gh-pages组件,配合external_repository推送到 GitHub 默认的个人资料公共仓库 xxxx.github.io。
拆分为两部分的好处,我可以在 GitHub Actions 界面 Artifacts 下找到生成的静态资源,方便人工核查备份。
除了 external_repository 选项外,另一选项 deploy_key,也需要额外设置。这个就是指的仓库设置中的部署密钥(Deploy Keys)。仓库级别的细粒度读写权限配置。
Deploy keys use an SSH key to grant readonly or write access to a single repository. They are not protected by a passphrase and can be a security risk if your server is compromised. If you have a complex project or want more fine-grain control over permissions, consider using GitHub Apps instead.
此处,Actions 需要目标仓库的 “写入权限”,但不能暴露我的个人 Token,故采用仓库 Deploy Keys + 仓库 Secrets 的方式。
Deploy Keys 设置
- 生成 SSH 密钥对
和本地生成 SSH 密钥对类似,现在本地终端执行 ssh-keygen 生成密钥对
ssh-keygen -t ed25519 -C "[email protected]" -f ~/.ssh/id_github_pages_deploy_key
生成后会得到两个文件:
id_github_pages_deploy_key:私钥id_github_pages_deploy_key.pub:公钥
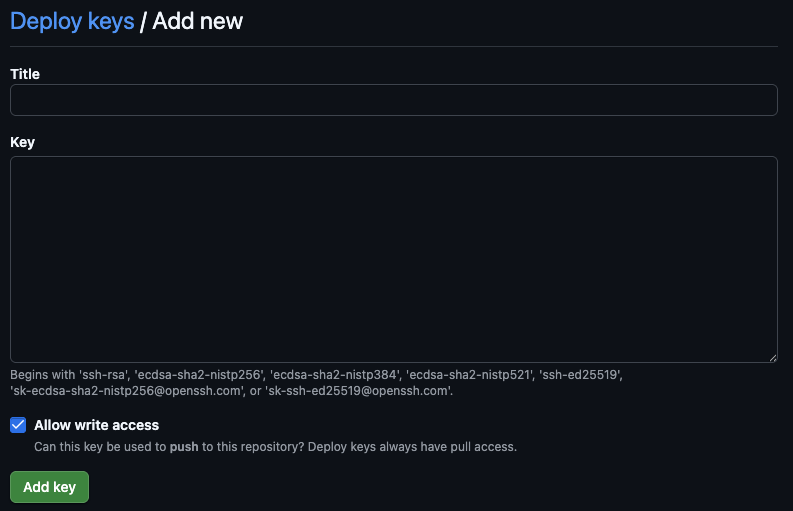
- 添加公钥到目标仓库的 Deploy Keys
进入目标仓库(xxx.github.io) Settings -> Deploy Keys,添加新的 Deploy Key,粘贴公钥内容 id_github_pages_deploy_key.pub,并勾选 Allow write access。
- 添加私钥到源仓库的 Secrets
打开源仓库(原始内容所在仓库) Settings -> Secrets and variables -> Actions,添加新的 Repository secret,名称为 PAGES_DEPLOY_KEY,内容为私钥 id_github_pages_deploy_key 的内容。
这样就完成了源仓库可通过SSH密钥对目标仓库进行写入操作的配置,有关部署密钥更多信息可以见官方文档[1]。
Cloudflare Pages
为了使用 Cloudflare 上已购买的域名和 CDN 加速,我使用 Cloudflare Workers & Pages 自动化同步 GitHub Pages 站点(xxx.github.io)。
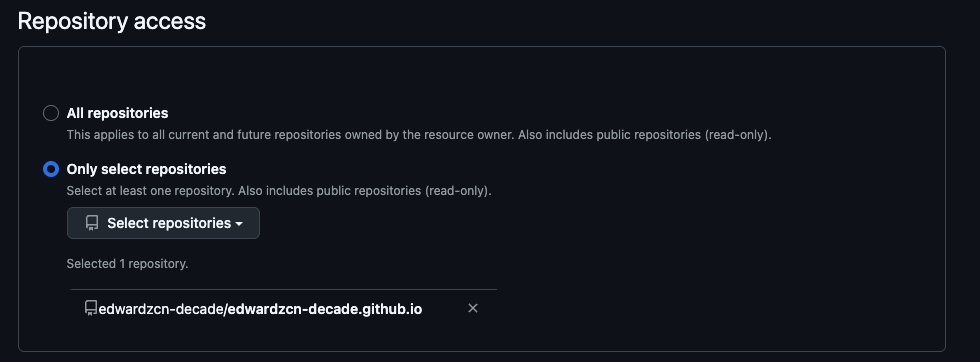
集成 GitHub 仓库内容可见 CF 文档[2],简单说只要在 GithHub 账户设置中安装好 “Cloudflare Workers and Pages” 勾选对应的 GitHub Pages 公开仓库,授予权限就可以了。这样每次公开仓库有更新,会进一步触发 CF Pages 的Action,自动拉取同步最新内容并部署。